Use the power of ARchitect to make small changes that will have a lasting impact. Follow along with the 7th episode of the Learning Series, Customize, Color-code, and Curate, to create your perfect ARchitect experience by organizing your groups, customizing fields, and cleaning up clutter.
1. Organizing Groups
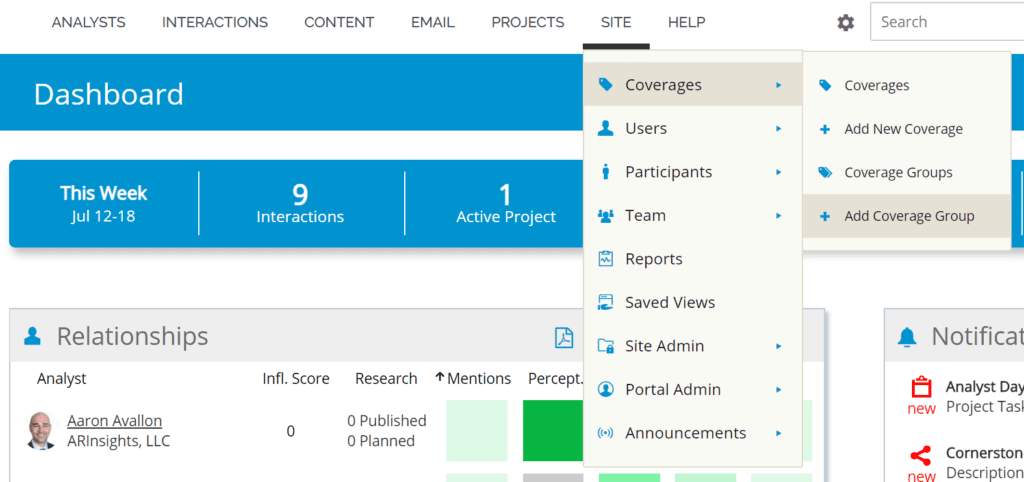
There are many different ways to organize your groupings in ARchitect whether they are participant, user, or even coverage groups. Using user groups is an easy solution that allows large organizations to group users together by departments to strategize. Participant groups can also be a great way to organize when you want to report on certain participants. A common example is to use participant groups to report on which of your executives are interacting with analysts. Lastly, coverage groups allow you to organize your coverages so you can easily use them for Share of Voice reports. For coverage groups, you even have the option to decide where your coverage groups can be viewed. To create a user, participant, or coverage group, scroll over to the Site tab, hover over coverages, participants, or users and hover over the Add New button. It should look something like this:
2.Customizing fields
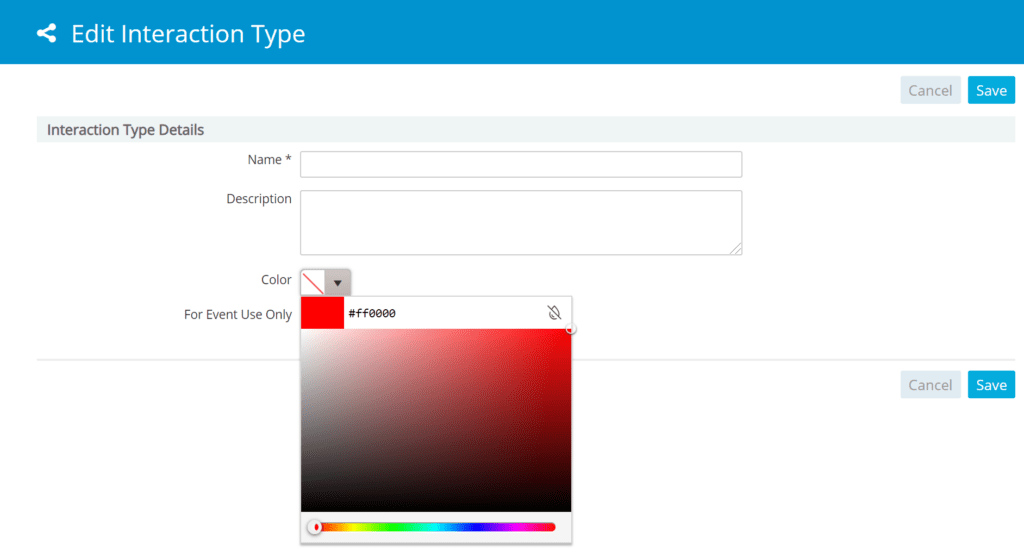
Now that we have your groups all set up, we can focus on personalizing ARchitect to your specific needs with custom fields and managing field options. Some field options you can customize are relabeling AR primary, adding project types and adding interaction types and colors. To relabel AR primary, hover over the site tab, then site admin, and select Relabel AR Primary. From here, there will be a text bar where you can enter a new label and hit save. To add a project type, hover over the site tab, then site admin, and select Project Types. A screen will pop up where you can type in a new project type and hit add & save. Lastly, to add interaction types, we will hit the site admin menu and select interaction types. Here, you can add an interaction type and assign a color to it to appear on your calendar. It will look something like this:
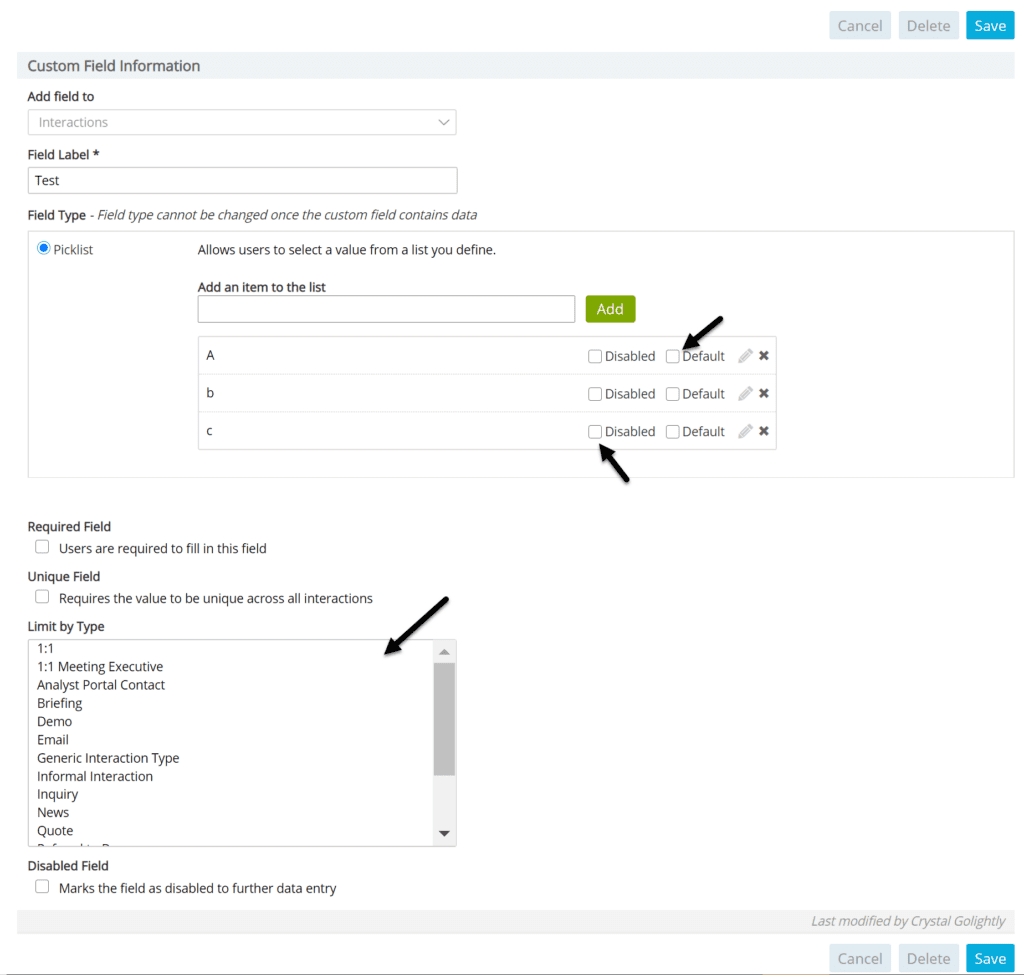
While you can customize those fields, you can also create custom fields from scratch for any information you might also need. These can be added to interactions, projects, and articles. To get to this page, go to custom fields on the Site Admin menu. You have many options for the field type ranging from picklists, emails, numbers, and text. When using a picklist field type, you can edit, disable, and default the options that you enter. For a custom interaction field, you can also select when the custom field is displayed based on the interaction type. For example, you can create a custom field like Key Takeaways or Key Insights show up when it’s an inquiry or briefing. Here is an example of what an interaction custom field can look like when setting it up:
3.Declutter with Disable
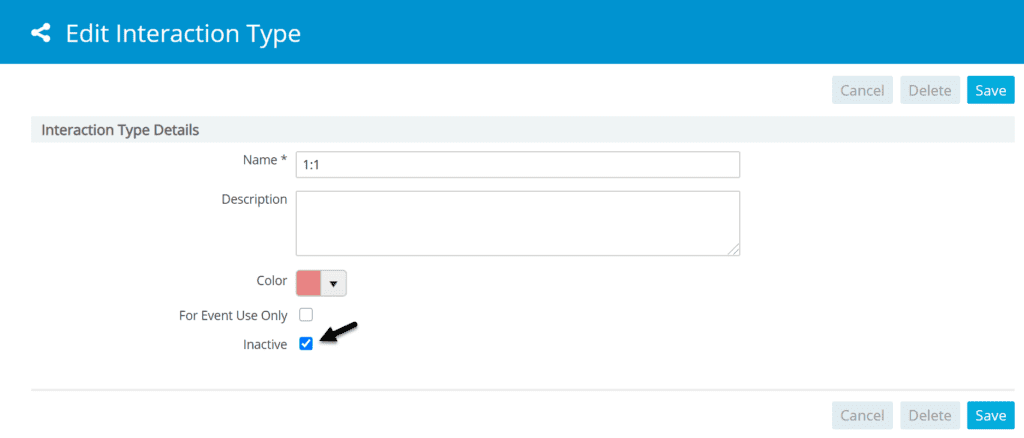
Woohoo! You now know how to set up some awesome shortcuts for your team. The next step is to declutter and get rid of anything you don’t want to use anymore. For all the groups and customizations we just made you can use either an inactivate or disable button. We recommend using both of these options to keep the historical data without deleting. When creating interaction types, you can easily remove them as options by selecting the one you want to remove and check the inactive box. This will look something like this:
For custom fields, there will be a similar Inactive button at the bottom of the edit page. To disable particular participants or users, hover through site admin to find the page view and select disable next to the name.

As mentioned before, we highly recommend using disable rather than delete so there is still historical data of the user or participant.
Have any more questions? Contact our support team for more help.